
Last Updated / Reviewed: November 25th, 2025
Execution Time: ~10 mins
A simple guide for adding BlueHuki to your Meta assets. If Meta assets are not set up correctly, your team cannot publish content, run ads, connect Instagram, verify domain, install tracking, manage events or track results.
This guide walks you through:
- How to check whether you have a Meta Business Manager
- Video on How to Add BlueHuki to Manage Your Page
- Already using Meta Business Manager?
Jump to Add to Meta Business Manager - Sharing access with a team member or contractor?
Jump to Granting Meta Business Manager Access to a Personal Account - Prefer to follow along visually? Jump to the video tutorial How to Give Access to Meta (Facebook + Instagram)
Let’s make this easy.
Goal: To grant Meta (Facebook + Instagram) access to BlueHuki as an admin so we can help manage your Facebook page, Instagram and / or ads.
Ideal Outcome: BlueHuki social media manager account will have access (but not ownership) to Meta Business Suite.
Do You Have a Meta Business Account?
This one step determines which instructions you should follow.
How to Check
Go to: https://business.facebook.com
You’ll see one of two things:
1. You See a Business Portfolio in the Dropdown
(Example: “The Cosmetic Blog,” “ABC Medspa,” etc.)
This means:
✔ You already have a Meta Business Manager
✔ You should add one of our BlueHuki team as an admin inside Meta Business
✔ Skip to: Add to Meta Business Manager
2. You Only See Your Personal Profile (No Business Accounts)
This means:
❌ You do not have a Meta Business Manager
✔ You are managing your Page directly
✔ You should add the BlueHuki social media manager using Page Access (Page-only method)
This means you DO NOT HAVE a Business Manager.
Skip to: Add to Facebook Page Only
How to Add BlueHuki to Manage Your Page
If your account does not show a Business Manager, you will grant access directly through Facebook Page Access.
Here’s how based on the walkthrough video.
- Go to Your Facebook Business Page
Open Facebook and navigate to your Page.
Make sure: ✔ You are logged into your personal Facebook
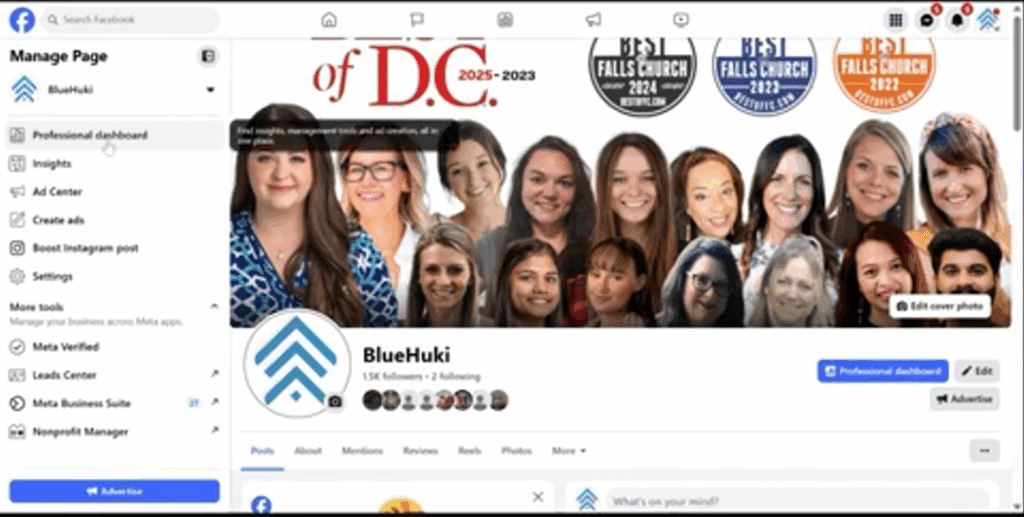
✔ You switched into the Page (so the Manage Page sidebar appears) - Open the Professional Dashboard
This is important. The permissions are NOT in “Settings.”
Instead, look at the left-hand menu, Click Professional Dashboard - Go to “All Tools” → Page Access
Inside the dashboard: Click All Tools, Scroll to Page Access
This is where Facebook keeps the list of everyone who can manage your Page. - Check Your Access Permissions
You’ll see a list of all people with Page Access.
If you see a button that says “Add New” → you have the correct permissions and you can add a new admin or collaborator.
If you do NOT see “Add New” and only see three dots → you do NOT have admin access and You need the Page owner to make the change. - Check if You Have a Business Portfolio
Scroll to the bottom.
If you see a Business Portfolio → you do have a Business Manager
If you don’t → you are strictly Page-based - Add the New Person
Click Add New → add the person’s Facebook account.
Facebook will send them an invite. - They Accept the Invitation
They must:
✔ View the Page as themselves (not acting as the Page)
✔ Open the Page
✔ Accept the access request banner or notification
Once accepted, access is active immediately.

Add to Meta Business Manager (If you already have a Business Manager)
Prerequisites or requirements:
- You need a Meta Business Suite Account;
- If you don’t have one yet (or have not heard of Meta Business Suite) you can follow the “Create a Meta Business Suite or Business Manager Account” at https://business.facebook.com
- This guide will also need your Facebook Page and Ads Manager to be managed by a Facebook Business Manager account, NOT from a personal account.
Why this is important: If your assets aren’t properly accounted for and managed, you can easily lose track who has access to what.
Where this is done: Inside Facebook Business Manager.
When this is done: To get started with a new marketing initiative
Who does this: Business owner or manager who has admin access to Facebook Business Manager.
Granting Meta Business Manager access to a Personal Account
- Access required: Admin
- Typical scenario: The business owner assigns ad accounts and pages to the agency contractor or employees so that they can work on them. A business owner/team leader assigns ad accounts to a team member.
- Who performs this action: Business owner or account manager who wants to share access to their Business Manager’s assets.
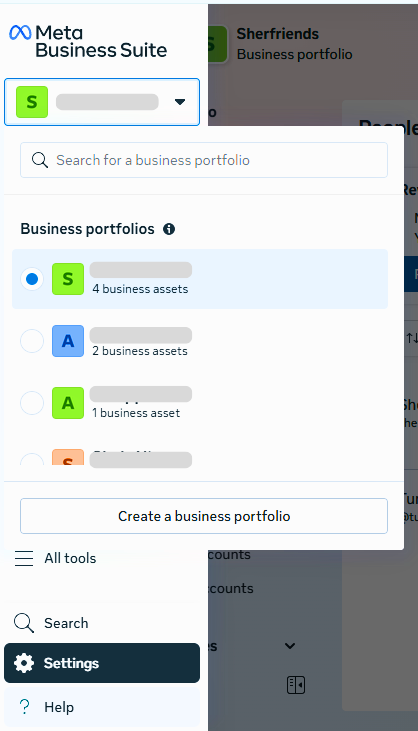
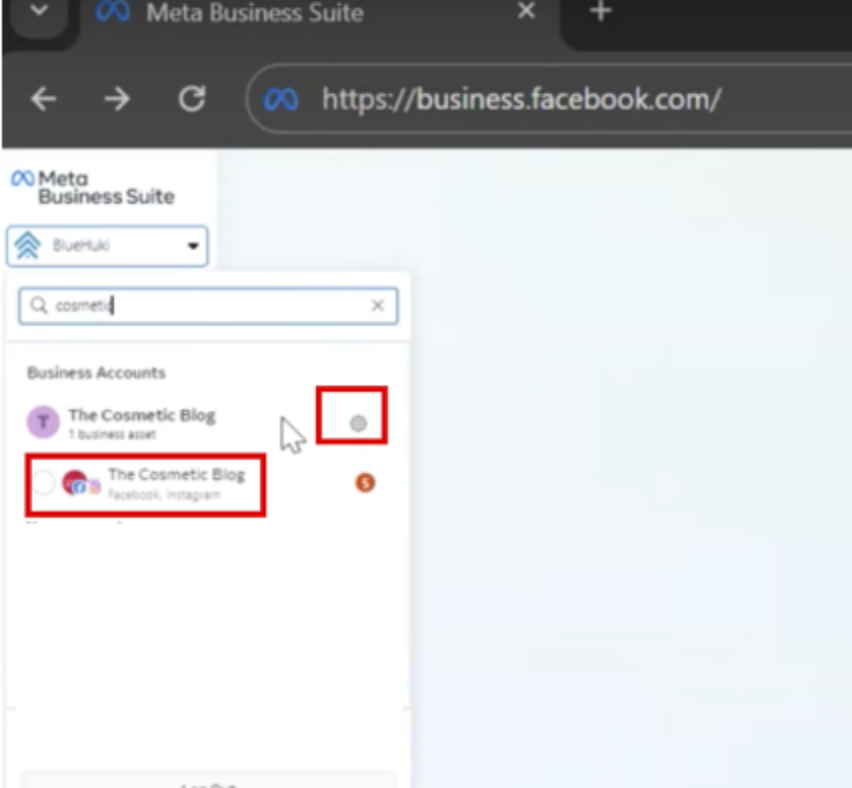
- Head to your Meta Business Suite settings here at at https://business.facebook.com
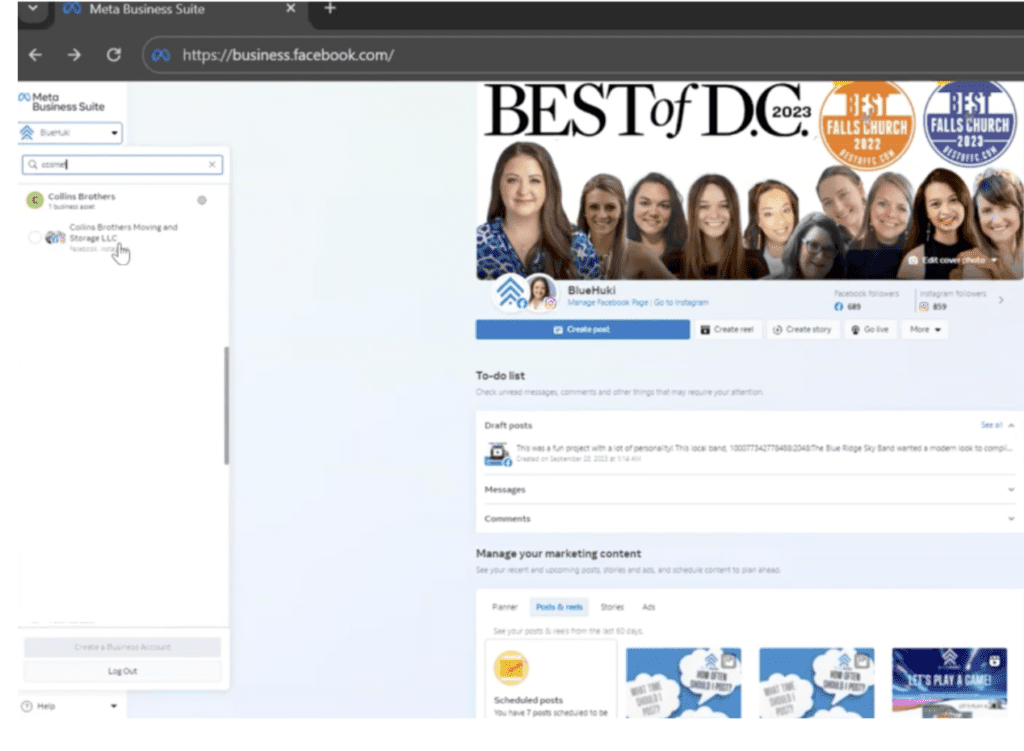
You will see a dropdown arrow under the Meta Business Suite. These are the Business Accounts. On the sidebar, search the Business name account.
Example: Search “The Cosmetic Blog”, you can see the Facebook Page and Instagram Page logo icon and a gear icon. Click the gear icon ⚙️.
2. On the sidebar, click “People” → “Add”

3. Enter the email address of the person that you want to give access to (ideally their work email, it doesn’t need to be the email associated with their personal Facebook account), make sure you are assigning the “Full Control” which will allow to manage the ads and social media posts and click “Next”;
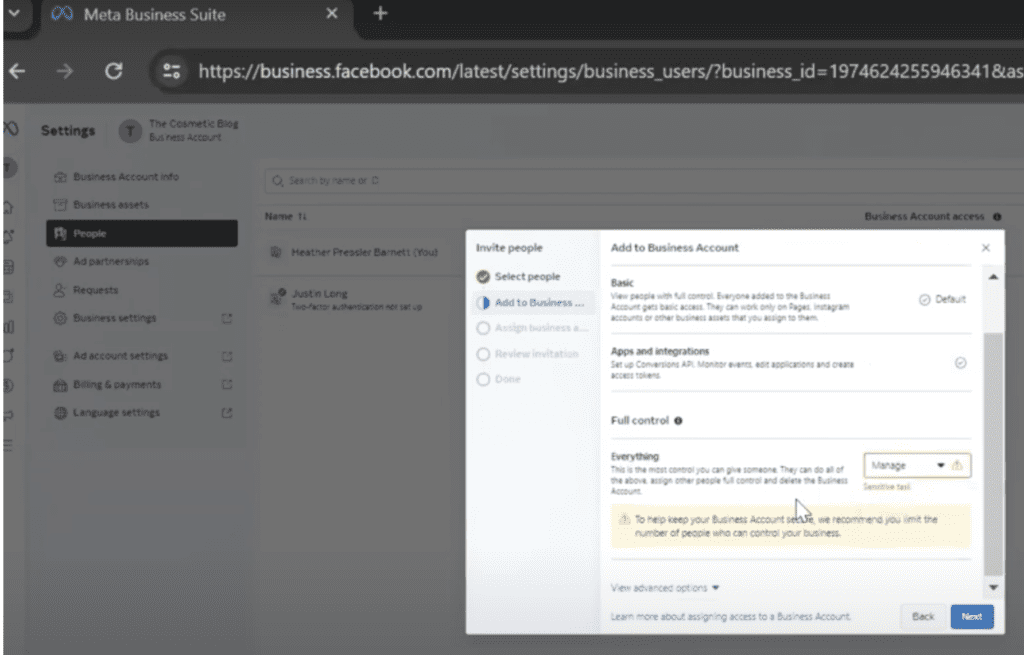
4. Assign the Business Assets. Click the Facebook Page and Instagram page. If you did not find the Instagram page, give us the login credentials and the team will connect your Instagram to the Meta Business Suite.
Turn on the toggle and under the “Full Control” on “Everything.” And then click “Next”.

5. That’s it! You will receive a confirmation email that they can use to connect their own account.
- You will receive an email containing the confirmation link a few minutes after you’ve sent the invite
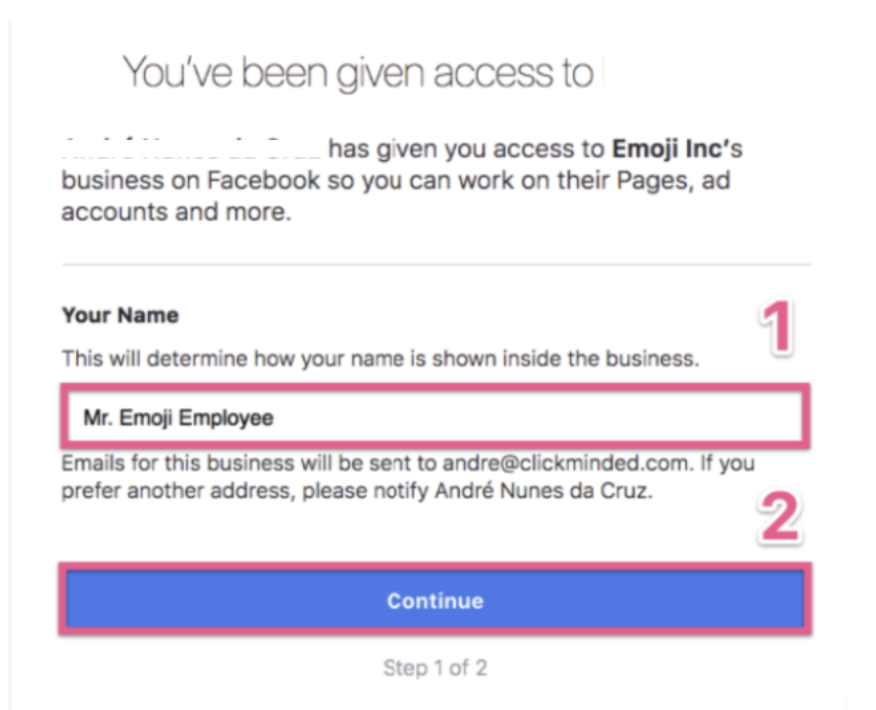
- Open the email → Click “Get Started”
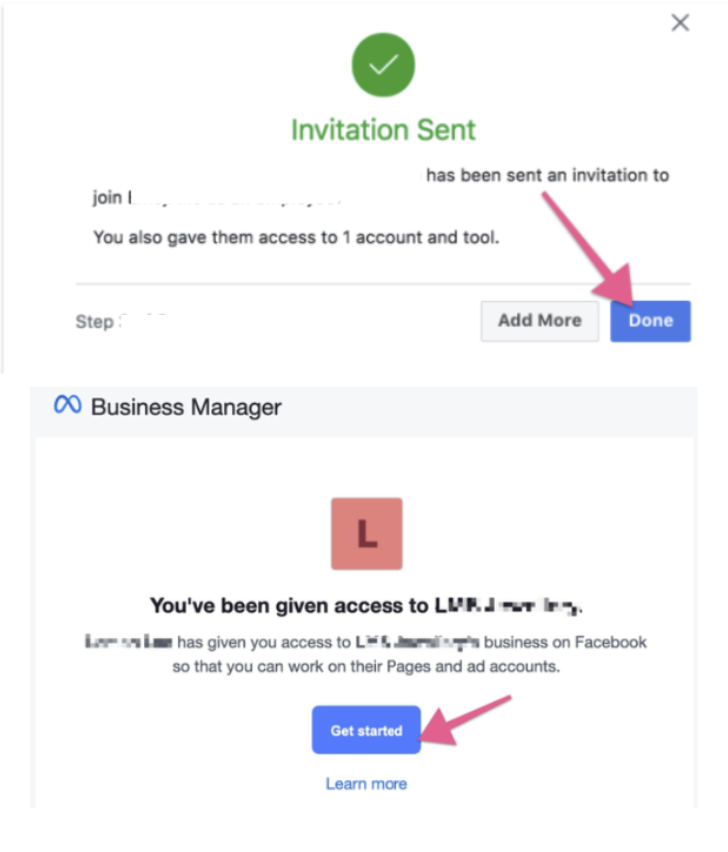
- Add your name and click “Continue”
- Login to the personal Facebook account, and that’s it, that Business Manager account and its assets are now shared!